If you are serious about singing then sooner or later you will have to invest in some equipment to make your recordings sound more professional. Although the price of the equipment can be fairly expensive, but you can always purchase one piece of equipment at a time, there is no need to invest all your money at once, slow but steady wins the race.
Your singing at home equipment should focus on soundproofing, and on recording as well. How soundproof the room is will directly impact the quality of your recordings, and the types of devices you use to record your singing. When it comes to singing at home equipment you can either go low budget or with a high budges build, both of them have their pros and cons, but if you are a beginner start small and expand your home equipment when you can.
If you want to enhance your singing and speaking voice then my personal recommendation is to use a natural vocal booster that also soothes and relieves hoarseness Click here to check it out on Amazon.com
Most singers begin singing at home and this has been the case for almost forever. The truth is that home is where you will learn the basics of singing, once you have mastered the basics of singing and you wish to further improve then you either need to invest in home equipment or you can rent a studio for a couple of hours. The problem with renting a studio for a couple of hours is that it will cost you a lot of money and oftentimes the waiting list is way too long to make it a viable option.
The main reason why so many singers opt for a home studio is that it is cheaper and they can record their singing at any time they want. Although one of the major problems with a home studio is that you will have to learn a completely new set of skills, like recording editing, and acoustics which all play a big part in how you will sound. If you are on my site then you are on the right path and making research about home equipment for singers.
If you have taken a look around in the online market you will see that there are several home equipment singing kits, my personal recommendation is to avoid these at all costs. Generally speaking, these kits are fairly cheap and their quality is exactly as cheap as it costs, invest only in high-quality equipment which could last you for decades and will make your voice sound a lot cleaner.
If you are investing in home equipment in the hopes that you will make it as a professional singer then my recommendation is to read my recent article How long does it take to become a professional singer? ( The Honest Truth ), this way you will have an easier way to transition from hobby singing to professional singing.
Singing At Home Equipment
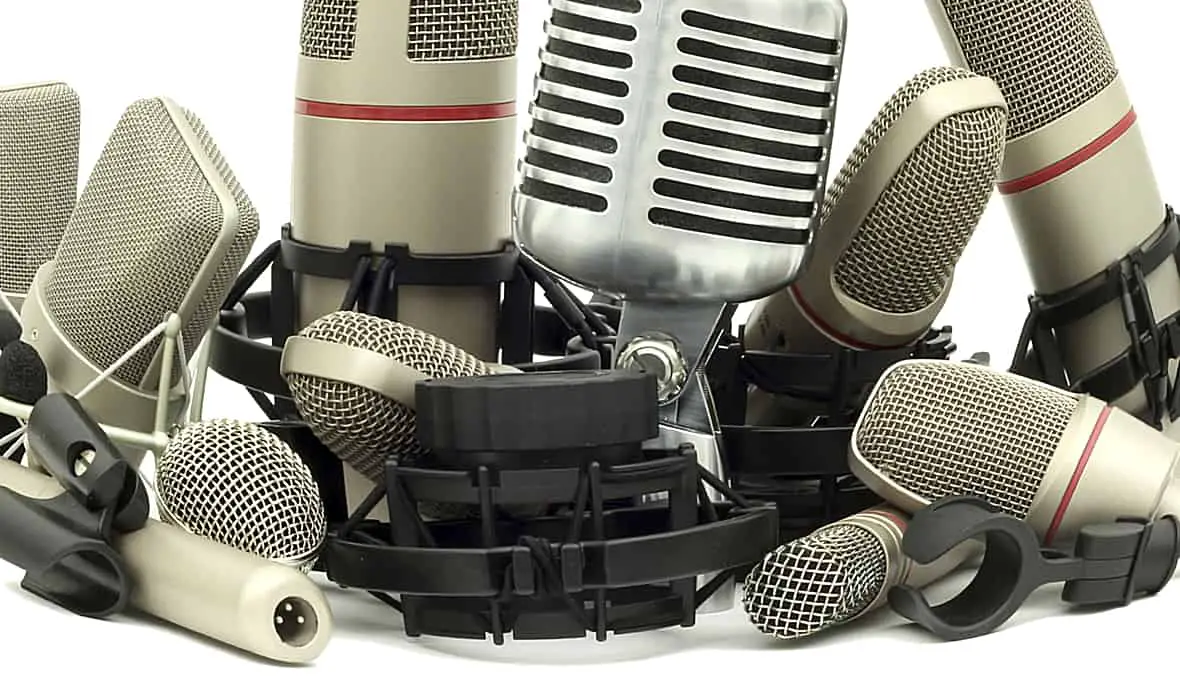
When singing at home, having the right equipment can enhance your practice sessions and ensure a better overall experience. Firstly, a reliable microphone is essential for capturing your voice accurately. Look for a microphone that suits your needs, whether it’s a USB microphone for connecting directly to your computer or an XLR microphone for more professional setups. Investing in a pair of good-quality headphones is also recommended, as they allow you to monitor your voice and hear nuances more clearly. A microphone stand or boom arm can provide stability and convenience during your singing sessions.
Additionally, if you plan to record your singing, a computer or laptop with recording software is necessary. There are many free or affordable options available for recording and editing your vocals. Lastly, consider creating a comfortable and acoustically-friendly space by adding foam panels or acoustic treatment to minimize echo and improve sound quality.
Earn a 50% Commission on each sale by simply sharing my guides with friends and family on social media, check out How To Sing Better 101 Affiliates
A Dedicated Room For Singing
The first thing to do even before you buy any of your fancy equipment is to find a dedicated room. Although this must not be 100% only dedicated to singing, but you will at least need a corner of a room where you can set up all your equipment and even more important to make it soundproof. Different rooms and houses will sound differently if you live in an apartment building my suggestion is to set up your home studio in a room that has exterior walls as these tend to absorb more sound than the interior walls.
If you are lucky enough to live in a house then the garage or even the basement will be good options. My recommendation is to declutter the room as much as possible, furniture generally speaking can resonate at certain frequencies which will distort the audio. If you do not have the possibility to declutter then your best option is to simply place some clothes or other items on your furniture which will absorb the sound.
Recording Desk
Click here to check out my recommended recording desk on Amazon.com
Now you might probably think that any old desk which has a place for your equipment should do just fine. The problem is with vibrations and most furniture can and will make a slight echo sound due to these small vibrations. Different materials absorb and propagate materials in different ways, if you look around the internet for recording desk you will see how pricey they can get, this is mostly due to the fact that they either absorb or outright cancel some of the vibrations.
Not only your voice will make vibrations but if you have ever turned on your laptop during a summer afternoon you probably noticed that the fan is spinning so fast that it almost sounds like it wants to take off, but the fan will also produce excess vibration which inevitably will end up in your recording. Personally speaking, I do not recommend you to buy a recording desk as they are extremely expensive and you can get the same results with a little DIY, below is how I built my recording desk:
- Get a desk, preferably made out of wood
- Once you have found where you place it, place it below each of the legs shock absorbents, you can find these at any hardware store and they are generally meant for washing machines. Go with the rubber ones as they tend to absorb most of the vibrations
- Put a large tablecloth on the desk, the thicker the better, preferably wool. Just keep in mind to not use those cheap wools which are almost disintegrating as the small pieces of wood might end up in your devices
- On the table cloth put down large mouse pads, you can either find the XXL versions of it or use 2-3 smaller bits. Do note that you only should use mousepads that are made out of rubber and not plastic.
- And there you go you have a recording desk that does not produce any echo and will absorb most of the vibrations caused by you or by your equipment.
PC Or Laptop
The first thing you will need in your home studio is a PC or laptop, this is what will bring together all the components. There are a lot of people who are suggesting Macbooks, but unless you have 3k to blow on something you can get for a couple of hundred dollars do not do it. There is virtually no difference between a Macbook and an average laptop other than the price, both will perform just fine for your home studio.
Any PC or laptop capable of running Windows 10 will do just fine if you are shopping around for a PC or laptop keep in mind that you do not need a powerful graphics card, which oftentimes is around 50% of the cost. There are second-grade brands like Acer and Lenovo that will do the job of recording your songs just fine, my personal recommendation is even if you have some extra cash invest it in the actual recording equipment like a condenser microphone rather than in an expensive Macbook.
DAW Digital Audio Workstation
Now that you have your PC or laptop you will need to find a good recording software (DAW). There are literally thousands of recording softwares, some are paid, but most of them are either free or have a trial version. If you start searching around the internet for which recording software is the best you will probably see one of the following 3:
- GarageBand: This software is for free and it only works on Apple devices, a lot of people seem to like it, although there are several which are better and free at the same time.
- Audacity: This software has almost everything you need from a recording software, the problem is that it is extremely technical and you will have to watch a couple of tutorials to get a grasp on it, on the other hand, it is for free.
- Tracktion: This is a paid software if you are lucky you might get your hands on a trial version. What is great about this software is that it is extremely noob-friendly and the interface will communicate effectively and intuitively.
As you have so many options when it comes to DAW software, my personal recommendation is to experiment with the free ones at first, there is no point in investing in some expensive software only for you to abandon it because you have found a better alternative. Just keep in mind that some of these softwares will alter the entire function of the recording device and even after uninstalling the software there might be some compatibility issues.
If you manage to learn how to edit and mix with your preferred DAW software then you have a lot easier chance to get noticed as you will stand out of the crowd who usually record their voice with a smartphone, for more information check out my recent article How to get discovered as a singer ( As FAST as possible ).
Condenser Microphone
Click here to check out my recommended condenser microphone on Amazon.com
As a singer you will need a good condenser microphone, my personal recommendation is to get a cardioid condenser microphone which has a large diaphragm. Personally, I am a big fan of Audio Technica, but you can find similarly priced microphones that more or less perform the same. Do note that when you are looking for a microphone you will see a lot of microphones that are meant for streaming, do not buy these as they are not good for singing.
Streaming microphones have an inbuilt system with which they focus on the background noise as oftentimes people who stream have the sound of the content and their voice in the background, as a singer the last thing you would want is for your microphone to pick up and focusing on the background noise. If you ever plan to make a karaoke party at your home, do not let anybody use your recording microphone, instead get a cheap one, if you want to know how to turn a karaoke night into a party check out my recent article Best karaoke songs for bad singers ( Top 27 ).
Microphone Stand
Click here to check out my recommended microphone stand on Amazon.com
Usually, when people build their home recording studios a microphone stand will be the last thing on their mind. However, the microphone stand is an integral part of any home recording studio. You can find this either dirt cheap or fairly expensive, the main difference is their quality and their ability to cancel out vibrations. Most cheap microphone stands are simply a stand on which the microphone will be placed and most of them do not offer any flexibility or durability to the user.
High-end microphone stands have inbuilt features that actually absorb the vibrations caused by the microphone and even stabilize the microphone. Although you will probably never notice these vibrations on even cheaper stands, the truth is that you will hear them in your recordings. My personal recommendation is to choose a microphone stand only once you have identified where you will place it, either wall-mounted or on the ground.
As an added filter I always place a rubber mat right under the stand to cancel any remaining vibration to come in contact with the ground or furniture.
Pop Filter For The Microphone
Click here to check out my recommended pop filter on Amazon.com
When it comes to a home studio it is vital to get a pop filter, not only because it will filter the popping sounds you make while you breathe but it will also filter out the background pop noises which may come from outside. These pop filters are relatively cheap, so you should buy 2 of them as with time they will deteriorate and will start to vibrate and create a distortion effect. Generally speaking, most beginner singers place their lips way too close to the microphone, this is not only not ideal for singing but in the long run, it could even damage the microphone.
As you are singing you will frequently inhale and exhale, if you stay close to the microphone the excess moisture will condense in the inside of the microphone slowly destroying it. Think of the pop filter as an easy way to filter out the popping sounds and an extremely cheap way to prolong the life of your microphone.
Soundproofing Foam
Click here to check out my recommended soundproofing foam on Amazon.com
If you have ever been to a professional recording studio you have probably noticed that the walls are filled with soundproofing foam. This foam simply absorbs the sound and does not let the echo to get back to the microphone. If you will set up a home studio then you will need at least a couple of soundproofing foams, although for most people it is not viable to put up these soundproofing foams in the entire room, but just a couple placed in a strategic location should do the job.
My personal recommendation is to place these soundproofing foams on the wall which is closest to the microphone. Start recording yourself and if you notice an echo effect then you will have to place either more soundproofing foam on the wall or relocate your microphone. Once you have identified the best sounding place for your microphone mark it with an X otherwise even small movements in the position of the microphone will cause different sounding recordings.
Headphones
Click here to check out my recommended headphones on Amazon.com
Headphones are as important if not even more than your microphone. There are literally thousands of different headphones on the market, the problem is that most of them are not meant for recording and listening purposes, but rather for general purposes. As a rule of thumb, do not buy any gaming headphones, these have horrible sound insulation and awful playback quality. What most people tend to forget is the actual cable for the headphones.
As you are singing you will constantly move your head and the cable of the headphones, cheaper headphones usually have a low-quality cable which will deteriorate after just a couple of weeks. My suggestion is to look for a headphone that has a braided textile cable, generally speaking, these will last you a lot longer even if you move a lot. When it comes to singing you have 2 options in terms of headphones:
- Open-back headphones: generally speaking these offer you the best sound quality money can buy, the drawback is that these tend to lack sound isolation, meaning you will probably hear outside noises. These microphones are more for advanced and professional singers and they do cost a lot of money.
- Closed-back headphones: generally speaking, these offer the best isolation, meaning that you will not hear any outside noises, the drawback with the extra isolation is that the sound quality will suffer. If you are a beginner singer then a closed-back headphones will be the best choice for you.
Studio Monitors
Click here to check out my recommended studio monitors on Amazon.com
Most people make the false assumption that studio monitors are just fancy speakers. The truth is that studio monitors operate differently and on other frequencies than speakers do. While the speakers do not have a focus and they generally tend to playback as broad of a sound spectrum as possible, on the other hand, studio monitors work on a specific sound spectrum to highlight the actual vocals of the artists.
There are a lot of people claiming that a home studio must have studio monitors, this is far from the truth. People who are on tight budgets should rather invest in a good microphone or headphones rather than in-studio monitors. The whole reason why studio monitors are needed is for mixing and editing porpuses, which you can actually do with a pair of headphones and not even have to worry about the distortion effect the studio monitors will make as the room is not soundproofed well enough.
Honestly speaking it is up to you if you want to invest in studio monitors or not, my personal recommendation if you are on a budget is to start and learn to edit without them, once you are comfortable enough with your editing skills only then invest in studio monitors.
XLR Cables
Click here to check out my recommended XLR cables on Amazon.com
Most of your equipment will be mostly “plug and play” with a USB interface, however, these USB cables do not do a good job when it comes to delivering sound. They are excellent for transporting data at a fast pace but they are not the best of audio or even visual technologies. You as a singer will need at least one XLR cable for your microphone, as a side note, keep in mind that not all microphones come with an XLR cable although most of them will have an XLR interface.
If you have decided to invest in studio monitors then you will need XLR cables for each monitor. When it comes to XLR cables you have two options:
- Unbalanced XLR cables, these are round cables that only have 2 pins, they are cheaper than the other type of XLR cables although the quality of the sound is a lot lower, my recommendation is even if these are dirt cheap to avoid them at all costs.
- Balanced XLR cables, these are round cables that have 3 pins, they are excellent for audio recording as due to their nature will cancel out any background and outside noise.
Key Takeaways
- Invest in a good microphone that suits your voice and recording needs. A condenser microphone is commonly used for recording vocals at home.
- Attach a pop filter to your microphone to reduce plosive sounds and improve the clarity of your recordings.
- Use a pair of studio-quality headphones to monitor your recordings and ensure accurate sound reproduction. Closed-back headphones are ideal for minimizing external noise interference.
FAQ
What equipment do you need for singing at home?
To start singing at home, you’ll need basic equipment such as a microphone, headphones, and a computer or smartphone with recording software. Additionally, having a quiet and comfortable space, good lighting, and a music stand can enhance your singing experience.
What do I need to start singing?
To start singing, you primarily need your voice as your instrument. However, having some basic tools like a songbook or sheet music, a mirror for self-evaluation, and access to vocal warm-up exercises or tutorials can also be beneficial.
How can I practice singing at home?
There are several ways to practice singing at home. You can start by dedicating regular time for vocal warm-ups, practicing scales and exercises, and learning songs that suit your vocal range. Utilizing online resources such as instructional videos or enrolling in online singing courses can provide guidance and help improve your singing skills.